
A month or so ago I was introduced into the world of the ServiceNow Rest API explorer. It was a rough into at best.
A little backstory always helps. I am still working on a project to automate most of my daily tasks in the VDI world. The need to create Incidents and Change tickets as part of the process I needed. I reached out to the ServiceNow team at work and asked if he had any automation scripts built, if not could I have access to the API Explorer. And the email responding back to this request was “No I do not have any automation built for  ServiceNow, If you would like to use it here is our ServiceNow Dev site URL, and Here are some credentials to log in.” As a person with limited RestAPI skills, this was kind of a dreaded moment. So I pick a weekend and jump in head first with the goal of wanting to be able to create and Update both Incidents and Changes by the end of the weekend.
If you google around you don’t find much out there for building scripts for this. And after the fact, I realize why. I don’t think anyone fully understands the API. Some may laugh at this but as an Infrastructure and VDI guy, this is a different concept for me. I have done a ton of work in PowerShell but limited with the API world so looking at this is more like reading Chinese.
So step One was finding the API Explorer…..This is not on the normal menu on the left side so of course, you have to search for it at the top. The next part is understanding what the API explorer does and how it can help you. Below is what you walk into. 
These 6 API calls are extremely useful. I have not spent much time with “Get Table” or Delete but getting pretty comfortable with the Post, Get, Put.
When I started working with this I had no idea on where to start. I tried to use the Post function first to see what the fields are. But it was rather confusing to me as I could not get it to fill in the caller info and a few other fields that required the Sys_ID. Decided to give up on this as I had no idea on how to use it. I decided to take a different route and went with creating an Incident from the normal create an Incident function from the web GUI. I filled out the Incident with all the fields with all the data I wanted to use, to begin with, so I can backward engineer from there. After creating the incident I started the process of doing a “Retrieve a Record”. 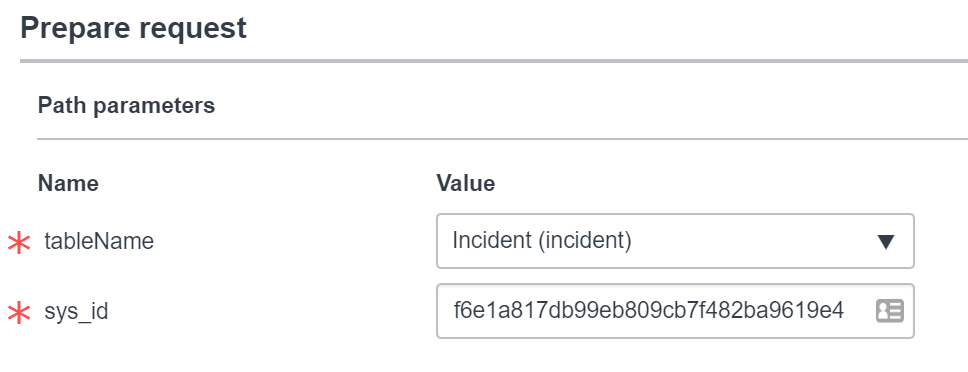
After clicking on Retrieve a record (GET) on tableName find Incident. Then put in your Sys_ID. The Sys_ID is in the URL for the Incident. ![]()
The Sys_ID is a 32 Character ID that is located in the URL of the objects you are looking up. As you see above this one is for our Incident. Now that you have this info in, you need to scroll down a bit to the sysparm_fields. This is where you choose what info to get back from your Incident. 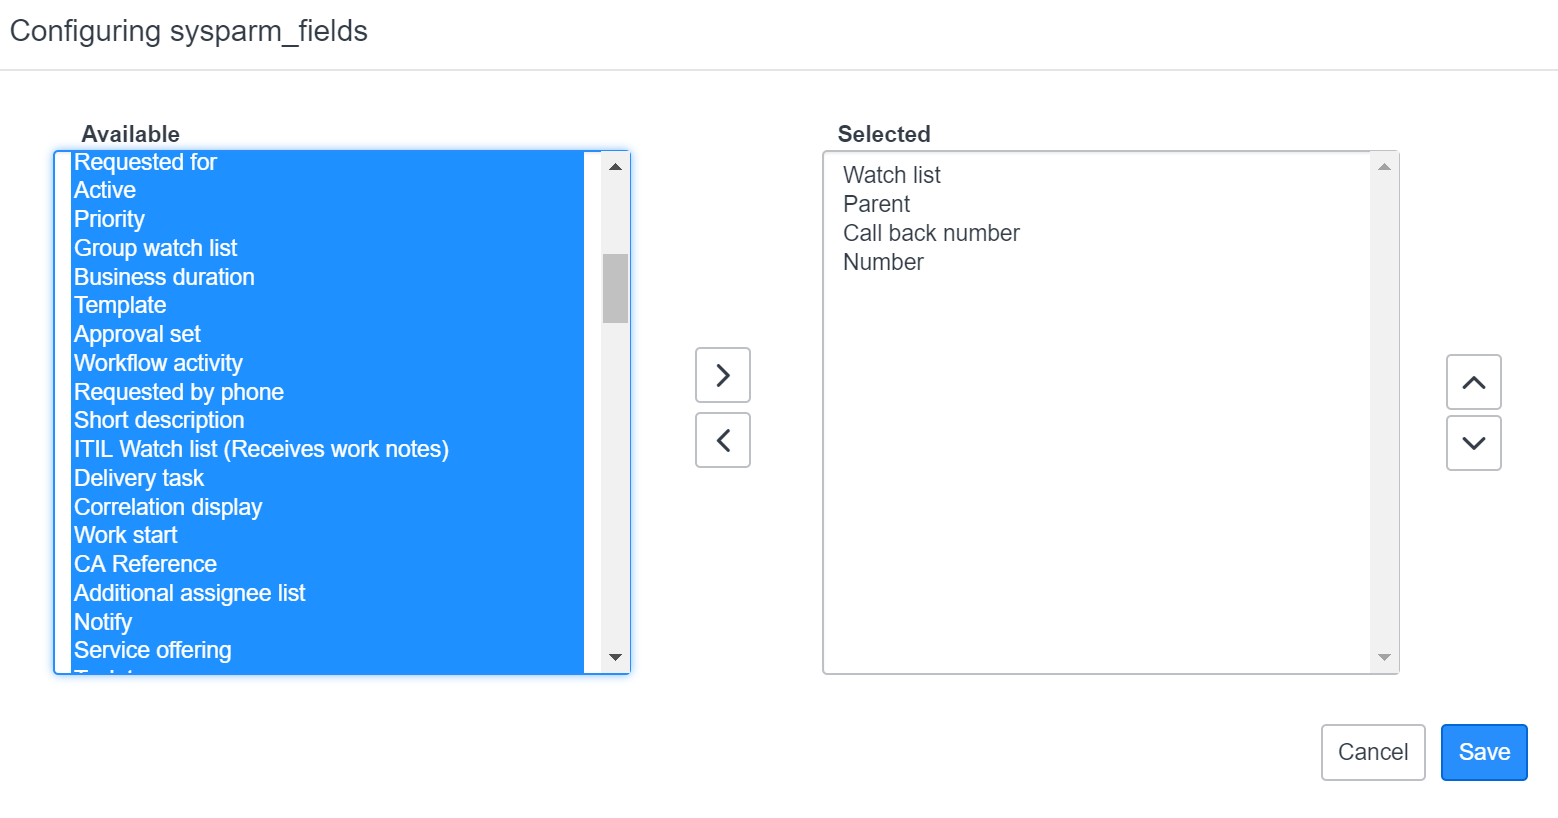
By default noting is in the Selected Colum out of lack of wanting to dig through the mess on the left I just normally highlight all and add them all. Then you don’t miss any of the fields that you may or may not want.
I leave the Formats in JSON. and then for this, I click the send button. But if you notice below the Send button in the Code Samples below. These are code samples are exactly what you just put in the fields above to retrieve the same info as you requested with the Send button. You can copy and paste the code and use it in your script. For example, this is the Powershell button.

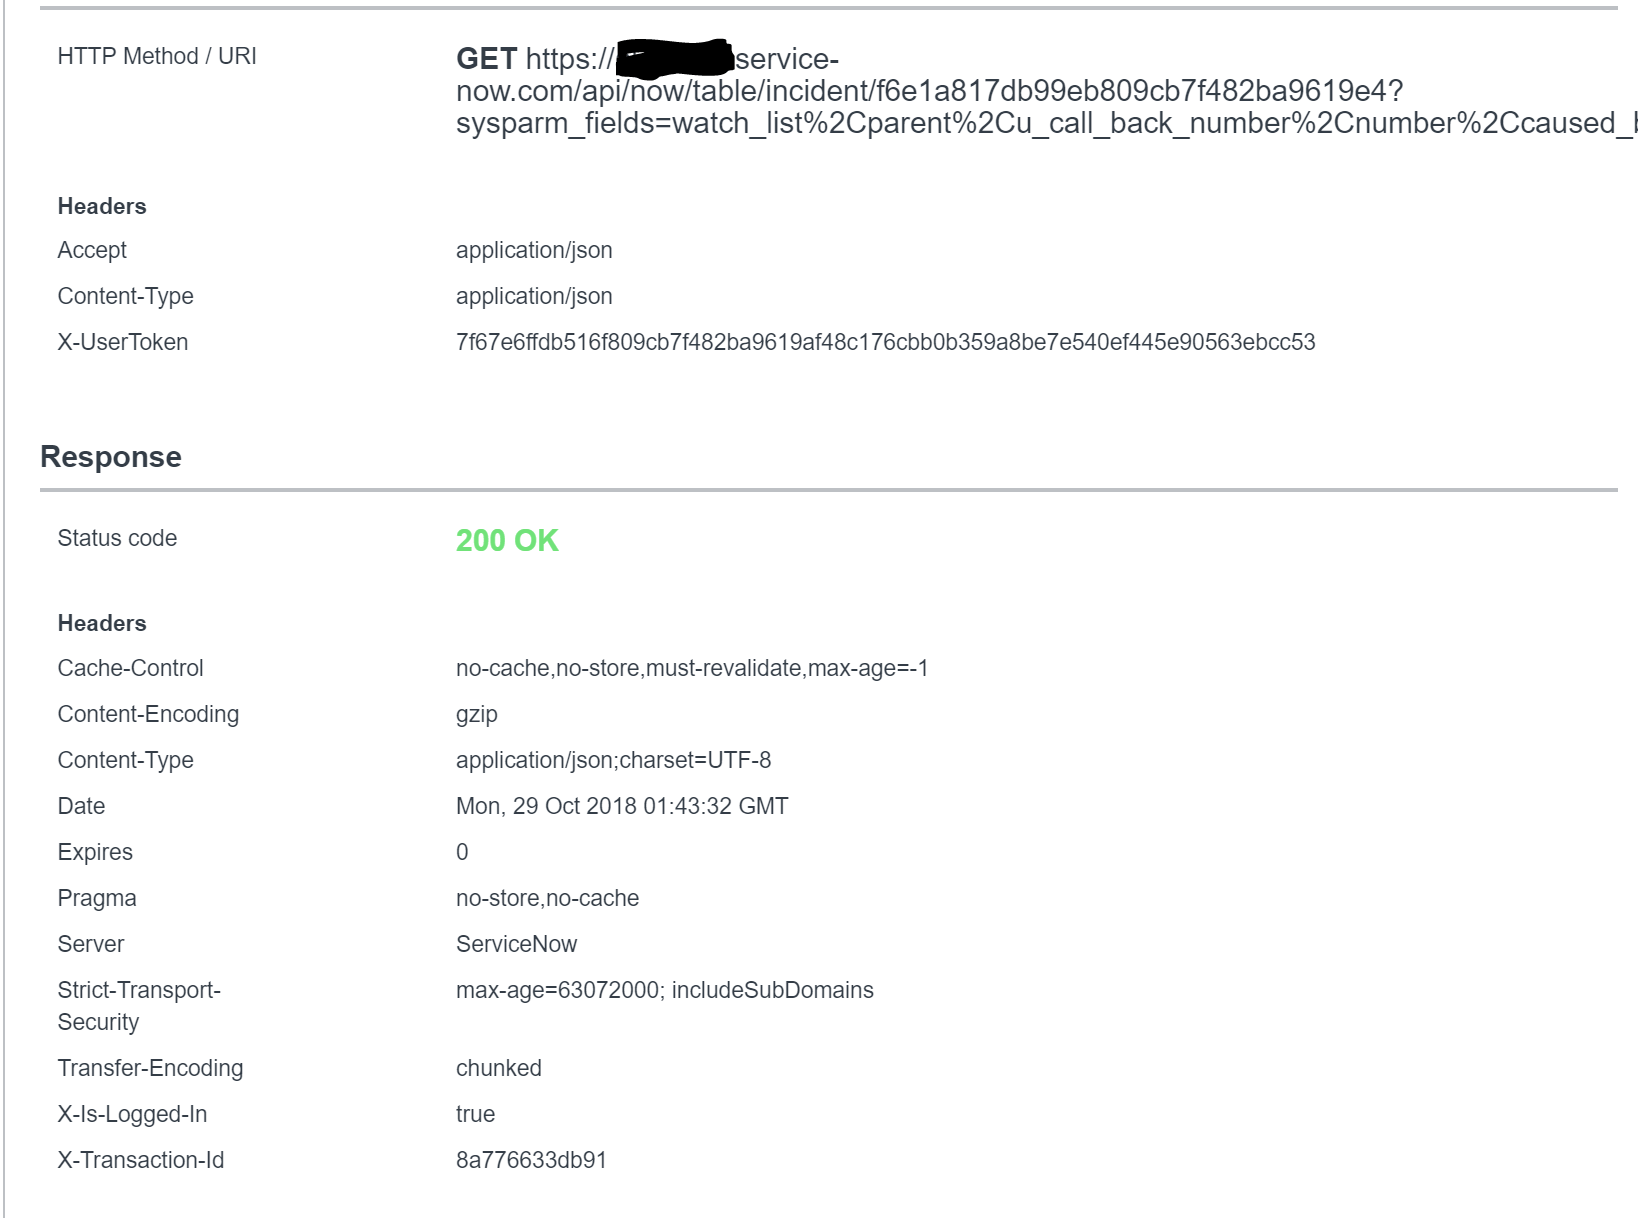
But further this if you scroll past the send button and the code examples it will show you when the Send button did, and if it was successful. It will show the HTTP method call, you can just copy and paste that URL into a browser and get the data. Also, it shows that the Status of the code was 200 meaning all good. It would give you a 404 error and be in red if you had the wrong Sys_ID in there.
Going beyond that it will show you the best part. It will show you all your results from your query. Yes all those fields with what service now calls those fields and how they populate them. For me, I just copied the data and pasted it into a Notepad so I could reference it in building my Create Incident script. 
From here there was more of an understanding of what fields are named and what data is expected in the area. And yes that long 32 character code is the Sys_ID for my user. But there are many more referenced in the ticket depending on what fields you populated. From here I felt confident on how to work my way through how to create an incident. After all, I had all the data I wanted to put in there. So go back to the top and choose to Create a record (POST). Then select the table for Incident again.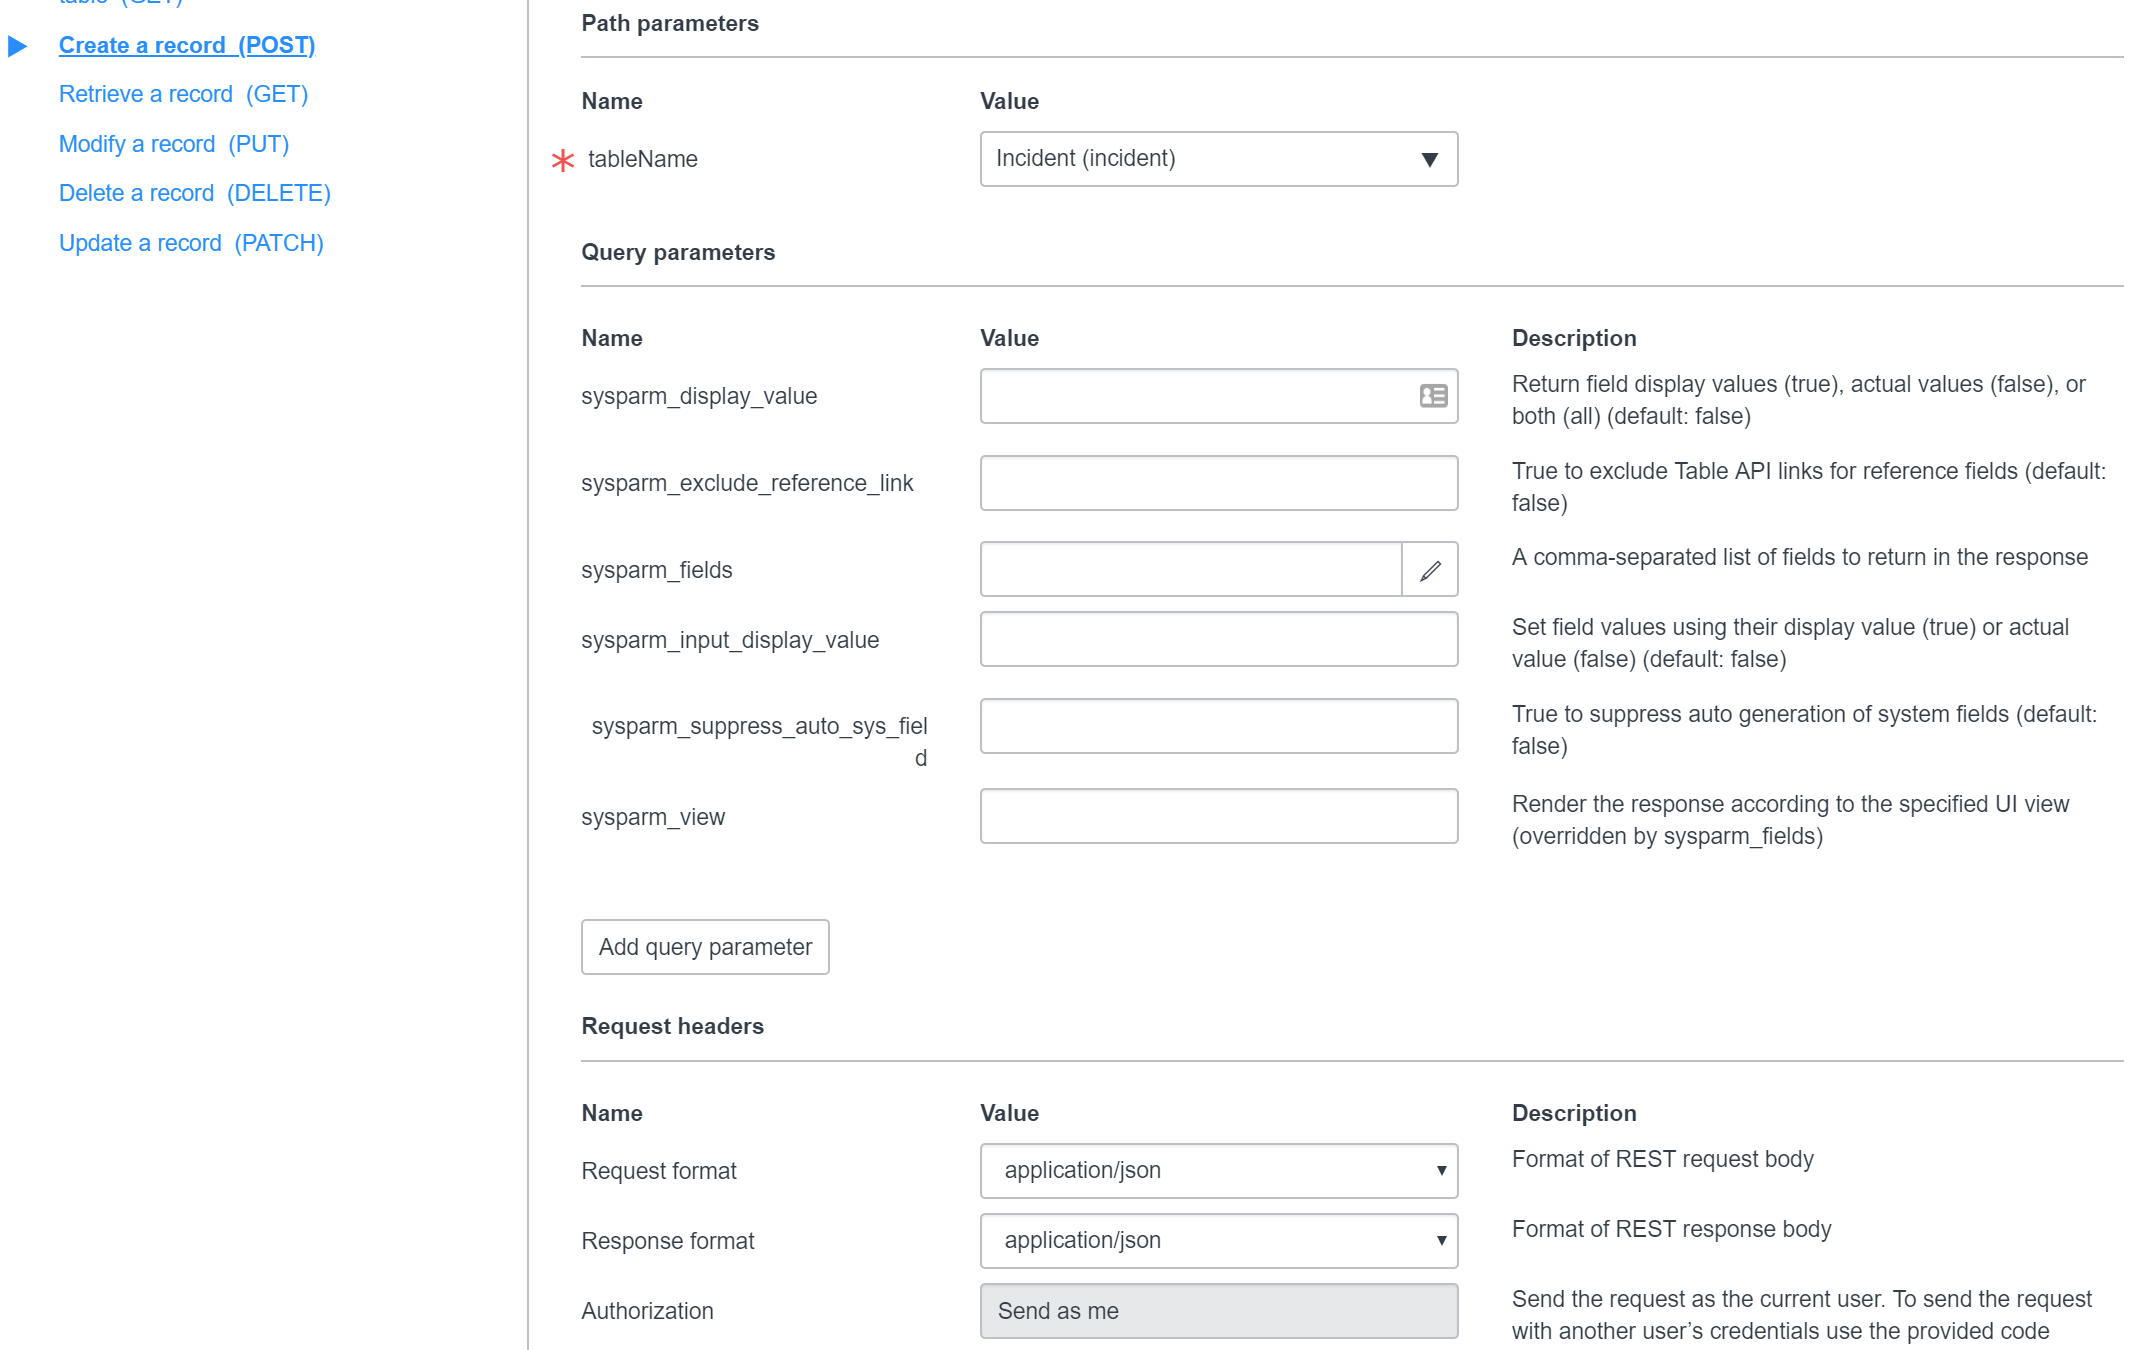
I just left the fields all default as all the data I cared about was below this. Looking below you see the Request Body area. This is where all the magic happens. If you click on “Add a Field” you a row of data you will fill.

If you click on “Add a Field” you a row of data you will fill. When you do that you also see what is required in the data field. For example, “Caller” is looking for the Sys_ID code for the person calling this Incident. And Urgency is asking for an Integer, and “Close notes” is looking for a String. I also filled in “Assigned To” to show how it fills in the data below.

Once you have entered all your data you can scroll down to the bottom of the page. If you click the Send button it will create an incident with all the data you just put in and show you it all works or does not. But click on the Code Examples that you want to use. For me, it was PowerShell. Click on it and it will give you the code to do what you need to do.

Here you can just copy all the code, paste it into an ISE window and run it. WRONG. you need to put in your creds is one thing. But there is a hidden JEM of an issue from the raw code. You will the below crap of missing a closing }. I tried to correct it and find a suitable place, but gave up. After some Google-Fu, I found an easy workaround was to just rebuild the Body variable into an array.

Building an array was a pretty easy workaround and also made the code look cleaner. No longer was your body statement one really long line it was now going to be a list. For me, I commented out the existing body line and just started to create my new one below it so I could copy the data I needed from the line.
# Specify request body
$body = @{ #Create Body of the Post Request
caller_id= "29711cc64f2bd308feda99701310c727"
urgency= "2"
impact= "3"
priority= "4"
category= "Your Catagory Find from the drop down menu"
subcategory= "Find the subcategory from the list"
u_item= "request" #Check the Drop down for the options
short_description= "Short Description of the Incident"
description= "Description of the Incident"
work_notes= "Work Notes"
comments= "Additional Comments and Notes"

}
$bodyjson = $body | ConvertTo-Json

# Send HTTP request
$CreateServiceIncident = Invoke-WebRequest -Headers $headers -Method $method -Uri $uri -Body $bodyjson -ContentType "application/json"
With replacing the body of the script now all should work well for you. Make sure you do change the last part of the HTTP request to replace the existing body with
-Body $bodyjson -ContentType “application/json”
This will simplify the issues. Now you should be able to automate your ServiceNow incidents.
In conclusion, you should be able to apply this to the creation of Change tickets and much more. I will try to continue to post on this topic as it seems there Is a lot of lost info in this area. I do have some prebuilt Scripts for Creating an Incident and Updating an Incident located here.

